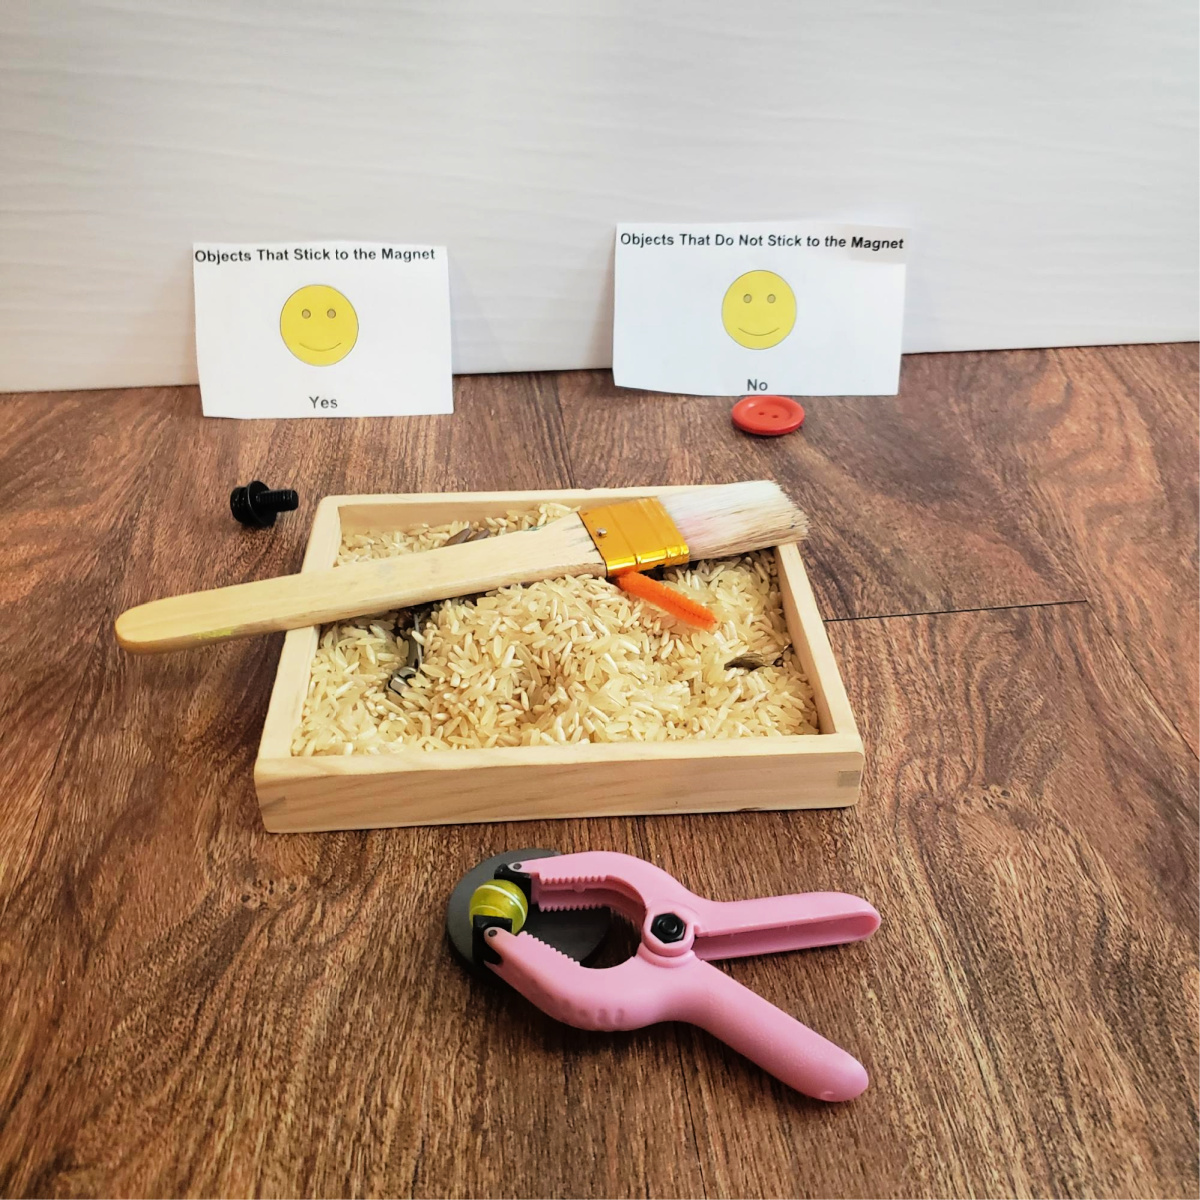
This activity, an invitation for developing questions about magnetism, is designed for preschoolers, ages 4–5 years old, and is part of a set of six activities for children and teens about Exploring Magnetism.
Developing Questions About Magnetism
You will present the question, “is it magnetic or nonmagnetic?” and then you will help the children to develop their own questions about WHY different things stick to the magnet and others don’t.
Using the same technique as before in the Activity for Toddlers, you will invite your child to sit in front of you or to the right of you and model how to do this activity. You will read the labels “magnetic, and nonmagnetic” slowly and purposefully before you place them at the top of your work area. You will then begin to peacefully dig and uncover the items from the rice using the paintbrush and tweezers, touch them with your magnet, show SHOCK AND AWE, and then categorize items between magnetic and nonmagnetic. But just the first few, then let them have a go at it!
Materials Needed
Here are the materials you’ll need to create the bin and work space so that preschoolers can begin developing questions about magnetism.
Magnets
Any kind is fine. I used some from my refrigerator, some connecting toys from my 7 year old daughter’s toy box, and some that I purchased in the craft section from Walmart for about $2 a pack.
Various Items
You will need plenty of items for your child to test for magnetism—both big and small! Just be sure to not use magnets on anything electric and discuss how putting magnets on certain electronics can ruin them FOREVER if the magnet is strong enough. I chose things like pipe cleaners, toothpicks, beads, dice, rubber bands, cotton balls, bobby pins, brads, safety pins, keys, chalk, crayons, glue sticks, markers, forks, foil, soda cans, pencils, jar lids, water bottle lids, vegetable cans, quarters, pennies, nickels, dimes, nails, screws, washers, bolts, nuts, springs from the inside of pens, etc.
Two Labels
These can be made out of pretty much anything. Sticky notes, cardboard, paper, dry erase markers on the kitchen counter, chalk on the sidewalk, pretty much anything! There just needs to be two, with one saying “Magnetic” and the other saying “Nonmagnetic.” (You can include pictures of a magnet and a magnet with an X on it if you want, but it’s not necessary.)
Dry Rice
This rice can be plain as it comes or you can dye it with food coloring and rubbing alcohol ahead of time for some extra pizzazz.
Wooden Box or Plastic Tray
Just something to hold all of the items buried and covered in rice to make it somewhat of an adventure for your child!
Paint Brush
For sweeping the rice out of the way.
Pliers or Tweezers
To help get the items out of the rice without touching it and making a huge mess.
How to Model How to Use These Materials for Your Preschooler
This activity, in addition to supporting preschoolers developing questions about magnetism, encourages fine motor skill exercise that will help prepare their hands for writing. Model for your child how to softly uncover the items, take it out with tweezers, and then place it against the magnet to check for magnetism!. Place the items next to the labels. YOU WILL BE SHOCKED HOW WELL THEY UNDERSTAND THIS CONCEPT!!!
When they have completed the activity, LET THEM EXPLORE! Let them see if they can get a toothpick to stick in between a metal item and the magnet, or between two different magnets. Try not to guide them with your words or suggestions. Just show them a cool thing or two and see how far they can go on their own! This will occupy their time and encourage them to keep experimenting.
Extending the Learning About Magnetism
I have done the developing questions about magnetism project on my own and adapted it in few ways to meet the needs of individual children, but if you would like to read more about another way this activity has been done, go to Touch Feel Learn ~ Magnetic and Non-Magnetic.
I hope that you and your child have fun together! The Next Activity in this series is Activity for Lower Grade Schoolers (6–9 yrs old).
For a full list of all six activities in this series please click here.
About the Author
Kelly Alston is a kindergarten teacher at the School of Science and Technology—Discovery who has been in love with learning for almost two decades. She has been happily married for almost 11 years and has a super rambunctious almost-eight-year-old daughter who loves science! Kelly herself is extremely extroverted and misses being in crowds of children and people in her classroom or at summer camp, but her introverted husband and daughter have been helping her to find joy in new ways, like making masks for their friends and family in their spare time.
