Introduction to Magnetism: Activity for Toddlers (2–3 Years Old)
This activity, an introduction to magnetism, is designed for toddlers, ages 2–3 years old, and is part of a set of six activities for children and teens about Exploring Magnetism.
Introduction to Magnetism
For young children, introduce this activity by starting with these pre-made materials put together by the parent or an older sibling. (Having an older child help prepare these materials will act as a craft time for them prior to their younger sibling’s science lesson.)
Rather than verbally give your child every instruction in this activity, it is best to model what you expect to be done.
The best place for this activity is on the floor. Have your child sit to your right side and place the bottles in front of YOU. Tell them you would like to show them something and that first it is going to be YOUR turn, and then it will be theirs. If they try to reach for any of the bottles quietly and firmly say the word, “WAIT” and add “not yet” or “it’s still my turn” if they are closer to three years old. Encourage them to continue watching because it will be their turn soon! Not only will they be learning about science, but they will be practicing important life skills as well.
Materials Needed
Here are the materials you’ll need to create the bottles for giving toddlers an introduction to magnetism.
Magnets
Any kind is fine. I used some from my refrigerator, some connecting toys from my seven-year-old daughter’s toy box, and some that I purchased in the craft section from Walmart for about $2 a pack.
Various Items
You will need plenty of items for your child to test for magnetism—both big and small! Just be sure to not use magnets on anything electric and discuss how putting magnets on certain electronics can ruin them FOREVER if the magnet is strong enough. I chose things like pipe cleaners, toothpicks, beads, dice, rubber bands, cotton balls, bobby pins, brads, safety pins, keys, chalk, crayons, glue sticks, markers, forks, foil, soda cans, pencils, jar lids, water bottle lids, vegetable cans, quarters, pennies, nickels, dimes, nails, screws, washers, bolts, nuts, springs from the inside of pens, etc.
Clear Plastic Bottles
Gather up enough bottles to have one for each different type of items you use—I recommend at least four.
I like bottles with smoother edges, but I don’t always drink bottled water like VOSS or Essentials, so I tend to use Nestle Purelife or Hill Country Fare water bottles. Big, medium, or small, it doesn’t really matter, just use what you have!
Hot Glue Gun or Super Glue (Optional)
Only if you plan on keeping the magnetism sensory bottles long enough for your child to possibly work with them unattended. We would not want the lid coming off and items ending up all over the place!
Duct Tape (Optional)
For taping around the lids—only if you intend to keep the bottles for a while.
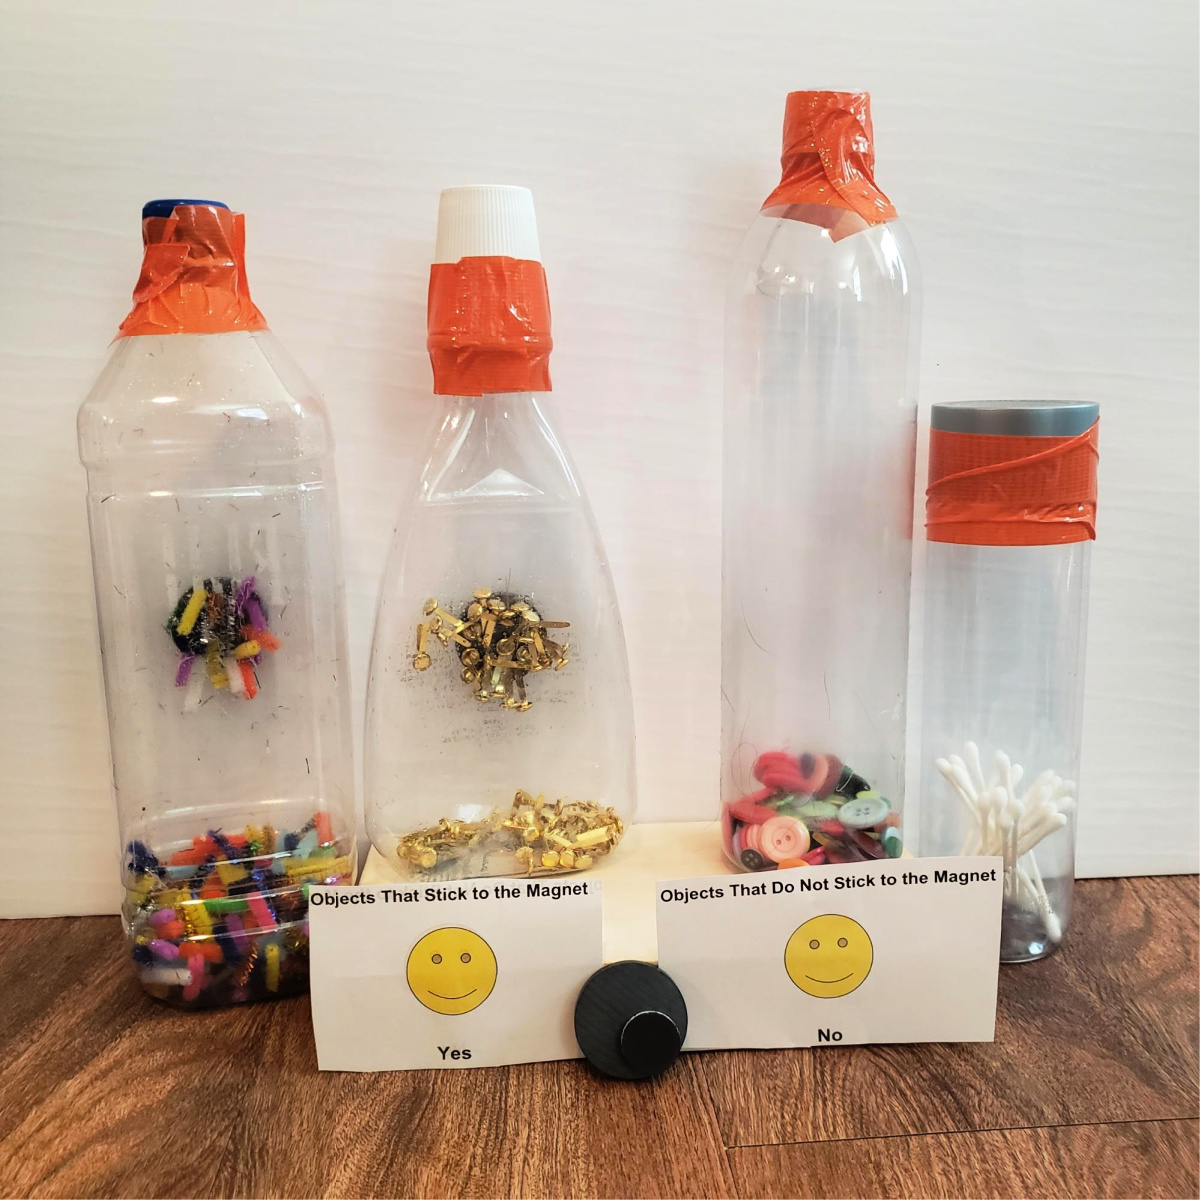
How to Make the Sensory Bottles
You will first need to take the label off of the water bottle and make sure that the inside is completely dry.
Next you will need to place one set of items into the bottles.
One bottle should have cotton balls, the next cut-up pieces of pipe cleaner, another with paper clips, and the fourth with toothpicks. To be clear, you can make as many different bottles as you would like, but only four should be introduced in the beginning so that you can properly teach your child how to care for their new materials and how to conduct the experiment safely.
Optional—you can place some hot glue on the inside of the lid and quickly twist it back onto the bottle. This should make it toddler proof.
But to be extra certain it is toddler proof I like to add some colorful duct tape around the lid as well.
How to Model How to Use These Materials for Your Toddler
First, you should slowly examine each bottle, carefully tilting them side to side.
Next, place them in a row in front of you and grab your magnet.
Then, slowly place the magnet on the sides of one bottle and slide up and down to see if anything inside moves. The more interested you appear to be, the more longer they will engage in this activity. Children tend to mimic what you do, so be careful not to toss it down or shake it up unless that is what you want them to do!
The goal is that they will build stamina so that they are able to sit through longer demonstrations and activities that ignite their own natural desire to learn.
Extending the Learning About Magnetism
I have done the introduction to magnetism project on my own and adapted it in few ways to meet the needs of individual children, but if you would like to read more about another way this activity has been done, see No Rust Magnetic Discovery Bottle for another technique on how to make sensory bottles using baby oil.
I hope that you and your child have fun together! The Next Activity in this series is Activity for Preschoolers (4–5 yrs old).
For a full list of all six activities in this series please click here.
 About the Author

Kelly Alston is a kindergarten teacher at the School of Science and Technology—Discovery who has been in love with learning for almost two decades. She has been happily married for almost 11 years and has a super rambunctious almost-eight-year-old daughter who loves science! Kelly herself is extremely extroverted and misses being in crowds of children and people in her classroom or at summer camp, but her introverted husband and daughter have been helping her to find joy in new ways, like making masks for their friends and family in their spare time.